Secrets to Perfectly Crispy Breakfast Potatoes (No More Soggy Spuds!)
There are few culinary delights as universally comforting and satisfying as perfectly cooked breakfast potatoes. The aroma alone, a symphony of savory notes sizzling gently, has a magical way of slicing through the morning routine, promising a truly delectable start to your day. Yet, for many, the dream of golden, crunchy exteriors giving way to a fluffy, tender interior often devolves into a disheartening reality of mushy, oil-laden spuds. If you've ever battled soggy potatoes, you're not alone. But fear not, because achieving that coveted crispiness is not just a chef's secret – it's an achievable goal for every home cook. We're here to unlock the secrets to ensuring your breakfast potatoes are always a triumph, never a tragedy.
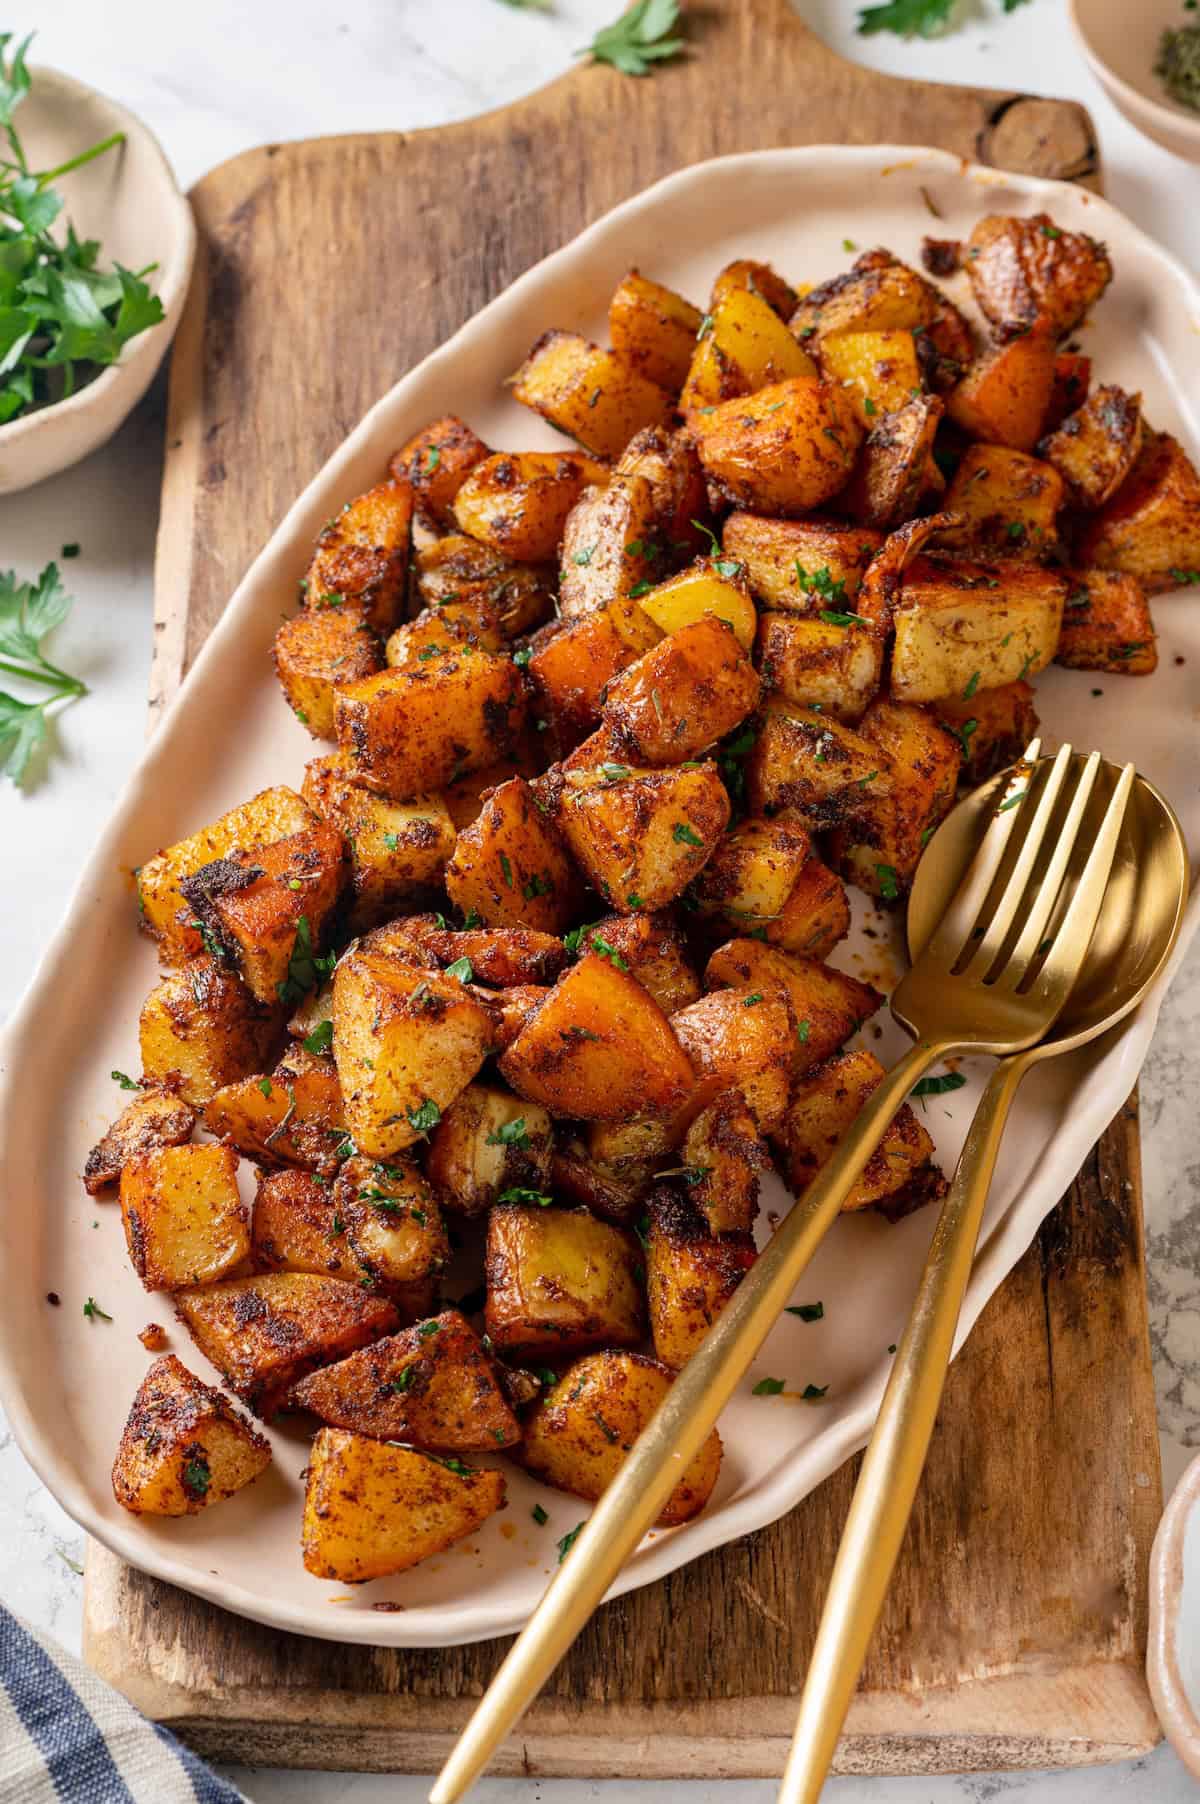
Imagine a plate where each potato morsel offers a delightful crunch, seasoned just right, ready to complement anything from a fluffy tofu scramble to a perfectly fried egg. These aren't just a side dish; they're an experience, elevating your entire breakfast (or even brunch, lunch, or dinner!) game. Ready to banish soggy spuds forever and embrace the joy of truly irresistible breakfast potatoes? Let's dive in!
The Quest for Crispy Breakfast Potatoes: Why It Matters
Why do we obsess over crispy breakfast potatoes? It's more than just a textural preference; it’s about transforming a simple root vegetable into something truly extraordinary. Potatoes are the ultimate comfort food, deeply satisfying and versatile. But when they're not crispy, they lose much of their charm. A soggy potato can be a heavy, unappealing addition to a plate, leaving you feeling less satisfied and more disappointed.
Conversely, a batch of expertly prepared, crispy breakfast potatoes offers a vibrant contrast to the other elements on your plate. They provide a much-needed crunch against soft eggs or creamy sauces, a savory counterpoint to sweet elements, and a hearty base for various toppings like fresh herbs, a dash of hot sauce, or even a sprinkle of cheese. They don't just fill you up; they genuinely make your morning better. That promise of golden, crunchy goodness is often all it takes to get you out of bed and into the kitchen, ready to seize the day!
Potato Perfection: Choosing Your Spud & Prep Secrets
The journey to crispy perfection begins long before your potatoes hit the heat. It starts with selecting the right potato and preparing it with care. These initial steps are the unsung heroes of crispiness, laying the essential groundwork for success.
The Right Potato for the Job
While some recipes might suggest russets, the true secret to consistently creamy interiors and wonderfully crispy exteriors lies in choosing potatoes with a slightly lower starch content. Our top recommendations are:
- Yukon Gold Potatoes: These are often hailed as the champions of breakfast potatoes. Their medium-starch content strikes a perfect balance, allowing them to become incredibly soft and creamy on the inside while crisping up beautifully on the outside. They develop a lovely golden hue and a subtle, buttery flavor that's simply irresistible. The longer they roast (without drying out), the crispier they become! For a deep dive into mastering this specific variety, check out our guide on Yukon Gold Perfection: Achieve Crispy & Creamy Breakfast Potatoes.
- Red Potatoes: Similar to Yukon Golds, red potatoes have a waxy, low-starch flesh that holds its shape well and crisps up nicely. They offer a slightly firmer texture and a delicate flavor, making them another excellent choice.
While russet potatoes can be used, their higher starch content means they can sometimes be more challenging to get uniformly crispy without becoming dry or crumbly. If you opt for russets, a thorough soaking and drying process becomes even more critical.
Pre-Cooking Prep: The Unsung Heroes of Crispiness
These crucial steps often get overlooked but are vital for preventing sogginess and ensuring even cooking:
- Wash and Peel (or not): Thoroughly wash your potatoes to remove any dirt. Whether you peel them is a matter of personal preference; leaving the skin on can add rustic charm and extra texture, especially with Yukon Golds or red potatoes.
- Dice Evenly: This is non-negotiable for even cooking. Cut your potatoes into uniform 1/2 to 3/4-inch cubes. Irregularly sized pieces will lead to some being overcooked and dry while others remain raw.
- Rinse and Soak (Crucial!): After dicing, place the potato pieces in a bowl of cold water and rinse thoroughly until the water runs clear. For an extra crisp boost, you can let them soak for 15-30 minutes. This process removes excess surface starch, which is a primary culprit for stickiness and sogginess.
- Dry, Dry, Dry: This might be the single most important step for ultimate crispiness. After rinsing (or soaking), spread the potato pieces out on a clean kitchen towel or several layers of paper towels. Pat them absolutely dry. Any residual moisture will steam the potatoes instead of allowing them to crisp, leading directly to a soggy outcome.
- Par-boil (Optional, but a Game-Changer): For stovetop methods especially, a brief par-boil can guarantee a tender interior. Boil the diced, dried potatoes in salted water for 5-7 minutes until just fork-tender but not mushy. Drain them well and spread them on a baking sheet to allow any steam to escape and for them to dry further before proceeding to frying or roasting. This trick ensures the inside is cooked perfectly before you focus on crisping the outside.
Mastering the Heat: Oven vs. Stovetop Techniques
Both the oven and stovetop can yield fantastic breakfast potatoes, but each method requires a slightly different approach to achieve optimal crispiness.
Oven-Roasted Brilliance
Oven roasting is fantastic for a hands-off approach and for cooking larger batches. It provides incredibly even crisping with minimal effort.
- Preheat High: A hot oven (around 400-425°F or 200-220°C) is essential.
- Single Layer is Key: Spread your well-dried potato cubes in a single layer on a large baking sheet. Do not overcrowd the pan; use two sheets if necessary. Overcrowding traps steam, preventing browning.
- Ample Oil: Drizzle generously with a high smoke point oil (like avocado, grapeseed, or canola oil). The potatoes should be lightly coated. Season now or after initial roasting.
- Toss Periodically: Roast for 20-25 minutes, then flip the potatoes and continue roasting for another 20-30 minutes, tossing every 10-15 minutes, until deeply golden brown and crispy. Avoid over-tossing, which can cool down the pan and break up the forming crust. Too little tossing can lead to uneven browning.
- Don't Overdo It: While longer roasting yields crispier outsides, be mindful not to let them dry out completely. Pull them when they're golden and tender.
Skillet Sizzle & Stovetop Secrets
The stovetop method is perfect for a quicker cook and allows for direct control over the browning process, resulting in a delightfully craggy, crispy exterior.
- Heavy-Bottomed Skillet: A cast iron skillet or other heavy-bottomed pan is ideal for even heat distribution.
- Proper Fat: Heat 2-3 tablespoons of high smoke point oil or a combination of oil and butter (or bacon fat for extra flavor!) over medium-high heat.
- Don't Overcrowd: Again, do not overcrowd the pan. Cook in batches if needed. Give your potatoes space to breathe and crisp.
- Initial Sear: Add the dried potato cubes to the hot oil in a single layer. Let them cook undisturbed for 5-7 minutes to develop a beautiful crust.
- Stir and Cook: Flip the potatoes and continue cooking, stirring every 5-7 minutes, until they are golden brown and crispy on all sides. This might take 20-30 minutes in total. If you par-boiled them, the cooking time will be reduced.
- Cover for Tenderness (Optional): If you didn't par-boil, you can cover the pan for the first 10 minutes after the initial sear (reducing heat to medium-low) to help the potatoes cook through, then remove the lid and increase heat to medium-high to crisp them up. This ensures they are fluffy inside and crispy outside.
The Flavor Factor: Seasoning Your Crispy Creations
Crispy breakfast potatoes are a blank canvas for flavor. While salt and pepper are a good start, a thoughtful seasoning blend elevates them from good to truly addictive. The reference contexts highlight the importance of a "smoky, savoury, and a little bit herbaceous" blend, and we couldn't agree more!
- The Core Blend: Start with generous amounts of sea salt and freshly ground black pepper. Then, add a blend of garlic powder, onion powder, and smoked paprika. Smoked paprika adds that wonderful deep, savory, slightly smoky note that makes breakfast potatoes so irresistible.
- Herbaceous Touches: Dried thyme, oregano, or rosemary can add an aromatic depth. For a fresh finish, stir in chopped fresh parsley or chives at the very end.
- A Hint of Heat: For those who love a kick, a pinch of cayenne pepper or chili powder can add a delightful warmth.
- When to Season: Many prefer to season after the potatoes are mostly cooked and beginning to crisp. This prevents the spices from burning and ensures they adhere well to the developing crust. However, a light initial seasoning before cooking can also infuse flavor throughout. Feel free to experiment!
The beauty of breakfast potatoes lies in their adaptability. Don't be afraid to customize your seasoning blend to match your palate or the meal you're serving. For more inspiration on versatile seasoning and pairing ideas, read our article Quick & Versatile Breakfast Potatoes: Elevate Any Meal, Any Day.
Beyond Breakfast: Enjoying Your Crispy Spuds
While their name suggests a morning meal, perfectly crispy breakfast potatoes are incredibly versatile and can enhance almost any dish throughout the day. They are the ultimate sidekick, ready to play a starring role or provide a supporting crunch.
- The Classic Pairing: Serve them alongside scrambled eggs, a fluffy omelet, breakfast sausage, or crispy bacon.
- Brunch & Lunch Upgrade: Tuck them into a breakfast burrito or taco, pile them high on top of a fresh green salad for a hearty lunch, or serve them with a juicy roast chicken or steak for dinner.
- Snack Attack: Honestly, a fresh batch of these spuds, hot out of the oven or skillet, makes for an incredibly satisfying snack all on their own.
Storing Leftovers: If you happen to have any leftovers (a rare occurrence!), allow them to cool completely before storing them in an airtight container in the refrigerator for up to 3-4 days. To reheat and bring back some of that coveted crispiness, spread them on a baking sheet and warm them in a hot oven (375°F/190°C) for 10-15 minutes, or reheat them in a hot skillet until revived.
Conclusion
No more soggy spuds! By understanding the importance of potato choice, meticulous prep (especially drying!), and employing the right cooking techniques for either oven or stovetop, you are now equipped with the secrets to consistently deliver perfectly crispy breakfast potatoes. The journey from humble potato to golden, crunchy perfection is a rewarding one, promising a culinary triumph that will elevate any meal. So go ahead, embrace these tips, experiment with your favorite seasonings, and prepare to delight in the irresistible joy of homemade breakfast potatoes that are crispy on the outside, tender on the inside, and utterly delicious from the first bite to the last. Your mornings (and any meal, really!) will thank you.
